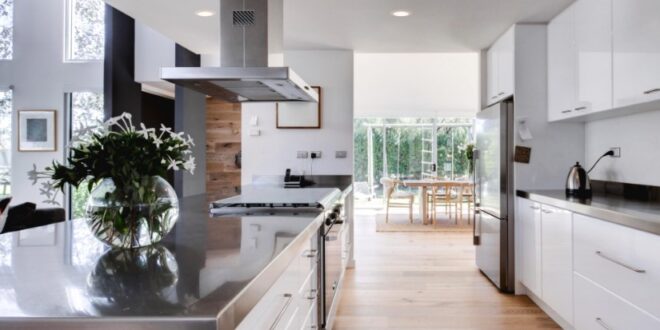
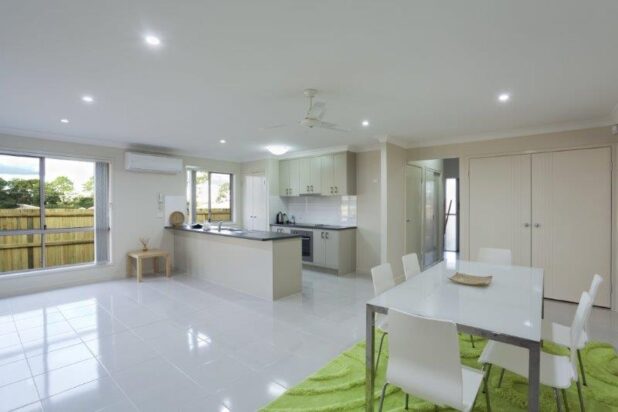
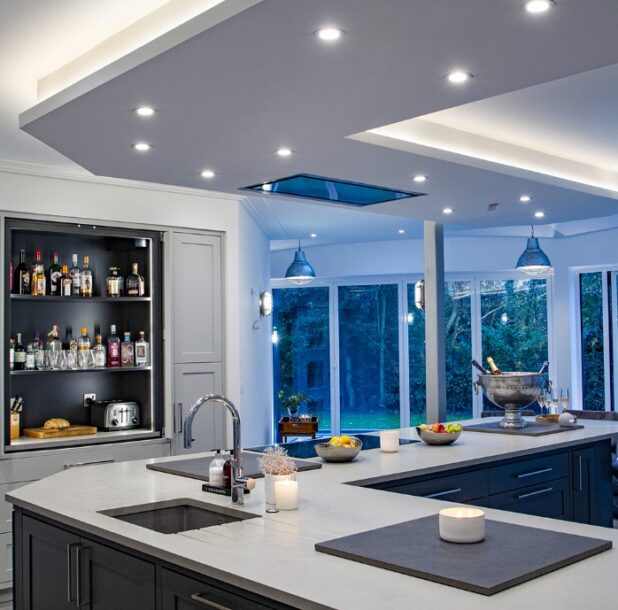
The kitchen is often considered the heart of the home, a place where meals are prepared, conversations are had, and memories are made. Proper lighting is essential in this multifunctional space, and LED downlights have gained popularity as a stylish and energy-efficient lighting choice.
Suppose you’re considering installing LED downlights in your kitchen. In that case, we will walk you through the process, from planning to execution, ensuring a successful lighting upgrade that enhances both the aesthetics and functionality of your kitchen.
Table of Contents
Planning Your LED Downlight Installation
Before diving into the installation process, planning your LED downlight installation carefully is paramount. Here are the key steps to regard during the planning phase:
Assess Your Lighting Needs
Begin by evaluating your kitchen’s lighting needs. Take note of areas that require task lighting, such as countertops, stovetops, and food preparation zones. Identify spaces where ambient or accent lighting might be beneficial to create the desired ambiance.
Determine the Number of Fixtures
Calculate the number of LED downlights you’ll need based on the size and layout of your kitchen. Consider factors like ceiling height, the desired brightness level, and the coverage area of each fixture.
Choose the Right Color Temperature
LED downlights come in diverse color temperatures, typically measured in Kelvin (K). Select a color temperature that complements your kitchen’s design and enhances its functionality. Warmer temperatures (around 2700K to 3000K) provide a cozy ambiance, while cooler temperatures (4000K to 5000K) offer brighter, more focused light.
Decide on Fixture Types
LED downlights come in diverse sorts, including recessed, surface-mounted, and pendant fixtures. Decide which type best suits your kitchen’s aesthetics and lighting requirements. Recessed downlights are a popular choice for a clean and modern glimpse, while pendant fixtures can add a touch of style.
Consider Dimmability
Think about whether you want the LED downlights to be dimmable. Dimmable fixtures offer flexibility in adjusting the lighting level according to diverse activities and moods in your kitchen.
Electrical Wiring and Safety
Ensure that your kitchen’s electrical system can accommodate the additional load of LED downlights. Safety is paramount; confer a qualified electrician to assess your electrical infrastructure and make any necessary upgrades.
Installation Steps
Once you have a clear plan in place, you can install LED downlights in your kitchen. Here are the paramount steps to follow:
Gather Necessary Tools and Materials
Before starting the installation, gather all the required tools and materials, including LED downlights, wiring, junction boxes, a drill, wire nuts, a voltage tester, a screwdriver, and safety equipment like gloves and goggles.
Mark the Fixture Locations
Based on your initial plan, mark the locations where you’ll install the LED downlights on the ceiling. Ensure the positions are evenly spaced and link with your kitchen’s layout.
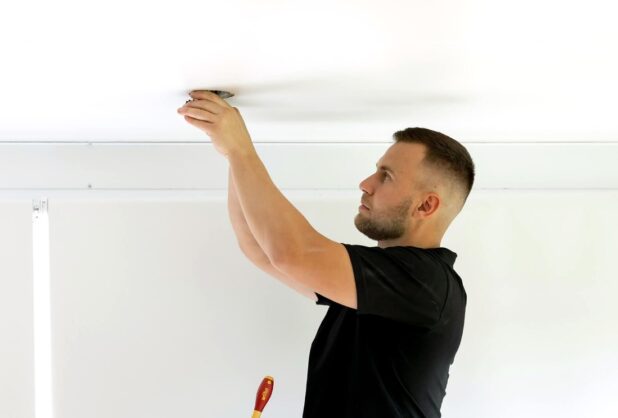
Cut Holes for Recessed Fixtures
If installing recessed LED downlights, utilize a hole saw attachment on your drill to create holes in the ceiling at the marked locations. Make sure the holes are the right size to accommodate the fixtures.
Install Junction Boxes
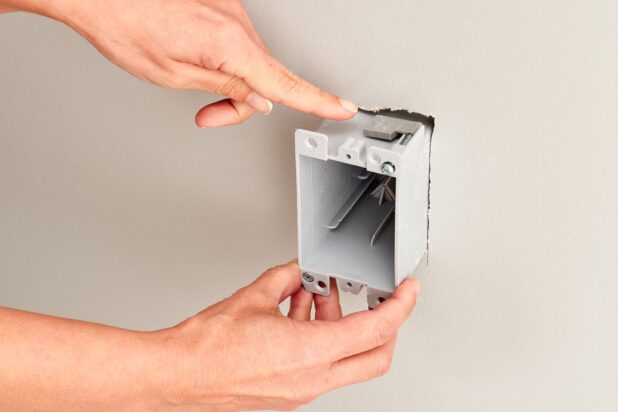
For surface-mounted fixtures or when required by local electrical codes, install junction boxes on the ceiling. These boxes will house the electrical connections for the LED downlights.
Connect the Wiring
Carefully follow the manufacturer’s instructions for wiring the LED downlights. Typically, you must connect the fixture’s wires to the house wiring utilizing wire nuts. Ensure that the connections are secure and well-insulated.
Secure the Fixtures
Install the LED downlights into the holes or mounting brackets, following the manufacturer’s guidelines. For recessed fixtures, make sure they are flush with the ceiling. Surface-mounted fixtures should be securely attached to the junction boxes.
Test the Lights
Turn the power back on and test the LED downlights to ensure they function correctly. Check for any flickering, dimming, or other issues. If you encounter problems, confer with an electrician for troubleshooting.
Install Trim and Accessories
If your LED downlights arrive with trim or accessories, such as baffles or reflectors, install them to achieve the desired lighting effect. These elements can help direct and diffuse the light appropriately.
Maintenance and Tips
To ensure the longevity and performance of your LED downlights, clean them regularly to remove dust and dirt, inspect connections for security, replace bulbs as needed, and consider upgrading to smart lighting controls for added convenience and energy efficiency.
Installing LED downlights in your kitchen can transform the space, providing energy-efficient and aesthetically pleasing lighting. Proper planning and careful execution are key to a successful installation. Following the steps outlined you can upgrade your kitchen’s lighting to create a welcoming and functional environment for cooking, dining, and entertaining. With the right LED downlights, your kitchen can truly shine. When installing LED downlights in your kitchen, it’s essential to use recommended fire-rated downlights to ensure safety and meet building code requirements.